XOSL 1.1.5 comes with indirect IDE CD-ROM booting support. For this, Smart Boot Manager is integrated into XOSL. That is, from XOSL it is possible to boot directly into Smart Boot Manager. Smart Boot Manager is a GPL'd boot manager that provides direct IDE CD-ROM booting support. When XOSL 1.1.5 is installed, it is an option (on by default) to also install Smart Boot Manager.
Booting Smart Boot Manager is like booting any bootable partition. That is, in XOSL 1.1.5 Smart Boot Manager is listed in the partition list, right below the ‘Original MBR' option. So, to boot into Smart Boot Manager, simply add a new boot item for it.

Smart Boot Manager lists all available bootable devices and partitions, including one or more IDE CD-ROM drives if available. To boot it, simply use the down cursor to select the right device and then press enter. Note that the first time you run Smart Boot Manager you will have to save changes. The Smart Boot Manager manual is also included in the download, and can be found in the manual/sbm folder. For the latest version of Smart Boot Manager, check its web site.

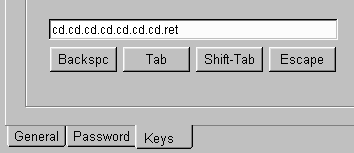
Ideally XOSL should act as a front-end to Smart Boot Manager, which means that CD-ROM booting should be as much as one click in XOSL. The most straight forward way to achieve this is to use the boot keys feature of XOSL. For instance, as seen in the above picture, the first CD-ROM drive is the 8th item. Thus to make XOSL boot a CD-ROM ‘directly', as boot keys you should specify ‘7x down' and ‘1x enter'.

1. It is seen on some systems that it takes several seconds before Smart Boot Manager is started. This seems to be caused by the IDE CD-ROM drivers, during initialization. So if it looks as if the system locked up, just wait a few seconds longer.
2. If a newer version of Smart Boot Manager is available, and you want to use it with XOSL, replace the existing SBMINST.EXE in the XOSL install folder with the newer SBMINST.EXE. After this you will have to completely reinstall XOSL. If you have XOSL installed to a DOS drive, first backup BOOTITEM.XDF and XOSLDATA.XDF (both located in the root directory where XOSL is installed), and restore them after install has completed. This way you will not lose your settings.
Smart Boot Manager
Copyright (C) 2000 Suzhe
http://btmgr.sourceforge.net
Extended Operating System Loader (XOSL)
Copyright (C) 1999/2000 Geurt Vos
http://www.xosl.org